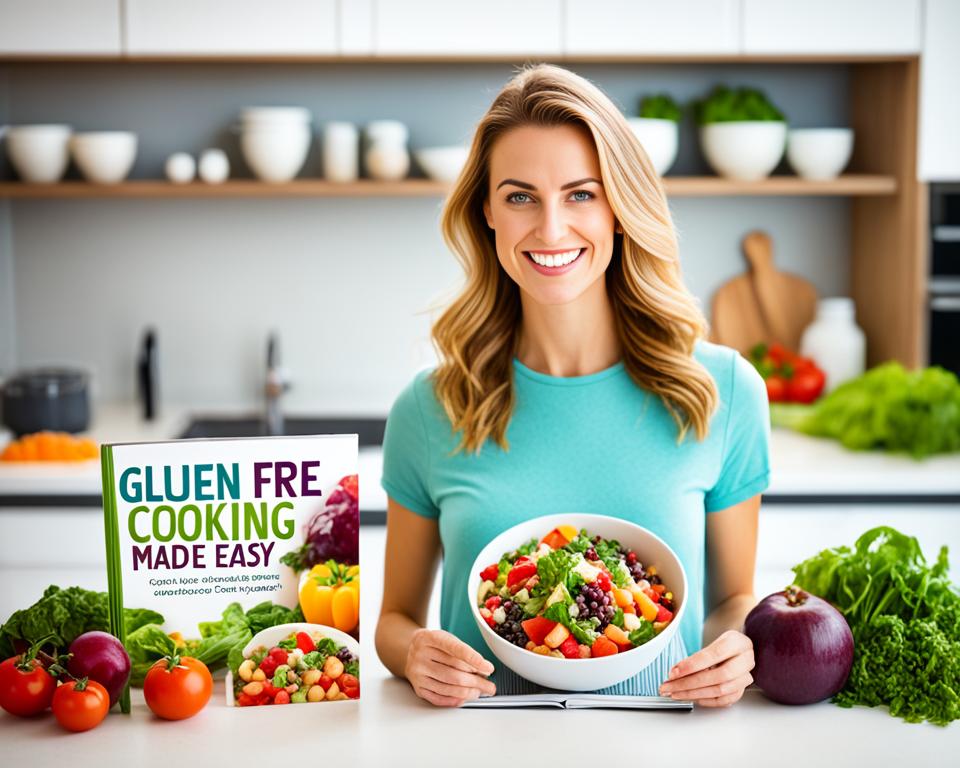
Transitioning to a gluten-free diet can be overwhelming, especially when it comes to baking. The good news is that with the right tips and techniques, you can still enjoy delicious treats without sacrificing flavor or texture. From simple recipes to clever baking hacks, this article will guide you through the world of gluten-free baking.
Key Takeaways:
- Start with simple gluten-free recipes like brownies or cookies to build confidence
- Follow gluten-free recipes closely to ensure the best results
- Measure ingredients by weight for accuracy in gluten-free baking
- Find the right balance of wet and dry ingredients for proper texture
- Add extra flavor to mask the taste of gluten-free flours
Start with Simple Recipes
Transitioning to a gluten-free diet can be challenging, especially when it comes to baking. But don’t worry, with a few simple tips and beginner-friendly recipes, you’ll be on your way to creating tasty gluten-free treats in no time.
When starting out, it’s best to begin with simple recipes like brownies, cookies, or pancakes. These recipes often require fewer ingredients and less complicated techniques, making them perfect for beginners. Not only will they help you build confidence in gluten-free baking, but they’ll also satisfy your cravings for delicious homemade treats.
Here are a few reasons why starting with simple recipes is a great idea:
- Easy to follow: Simple recipes typically have clear, concise instructions, making them easy to understand and follow, even if you’re new to gluten-free baking.
- Minimal ingredients: Simple recipes often require basic pantry staples, such as gluten-free flour, sugar, eggs, and butter or oil. You won’t have to worry about hunting down hard-to-find specialty ingredients before you can start baking.
- Quick results: Simple recipes generally have shorter baking times, meaning you won’t have to wait long to enjoy your homemade gluten-free treats. This instant gratification can be very rewarding, especially for beginners.
Starting with simple recipes is an excellent way to familiarize yourself with gluten-free baking techniques, understand the texture and flavor differences, and learn how different gluten-free flours behave in recipes. As you gain more confidence, you can gradually experiment with more complex recipes and explore a wider variety of gluten-free baking options.
Remember, practice makes perfect, and every baking success, no matter how small, is an achievement. Embrace the learning process, have fun in the kitchen, and enjoy the delicious results of your gluten-free baking endeavors!
| Ingredients | Instructions |
|---|---|
|
|
Follow the Recipe Closely
When it comes to gluten-free baking, precision and accuracy are key. Unlike traditional baking where you can make substitutions and adjustments, following gluten-free recipes closely is essential to achieve the desired results. These recipes have been meticulously tested and crafted using specific gluten-free flours and ingredients, ensuring the perfect texture, taste, and structure in your gluten-free baked goods.
Gluten-free baking is a science, and slight variations in ingredients or measurements can significantly impact the final outcome. To achieve success in your gluten-free baking endeavors and avoid any disappointments, it’s important to pay attention to the recipe and adhere to it as closely as possible.
“Gluten-free baking is a science, and slight variations in ingredients or measurements can significantly impact the final outcome.”
By following the recipe accurately, you can benefit from the knowledge and experience of the recipe developer, who has spent countless hours perfecting the combination of gluten-free flours, binders, and leavening agents to create a delicious and foolproof recipe.
Every ingredient plays a crucial role in gluten-free baking, and even minor deviations can lead to undesirable results. For example, substituting one type of gluten-free flour for another might alter the recipe’s texture, taste, or rise. It’s best to stick to the recommended flours and ingredients to ensure the desired outcome.
So, the next time you’re embarking on a gluten-free baking adventure, trust the recipe and follow it closely. Your dedication to accuracy and recipe adherence will reward you with mouthwatering gluten-free treats that everyone can enjoy.
Common Ingredients in Gluten-Free Baking
| Ingredient | Role |
|---|---|
| Rice flour | Provides structure and bulk |
| Almond flour | Imparts a nutty flavor and adds moisture |
| Tapioca starch | Enhances texture and elasticity |
| Potato starch | Contributes to lightness and fluffiness |
| Xanthan gum | Acts as a binder and improves texture |
| Baking powder | Provides leavening and helps with rise |
https://www.youtube.com/watch?v=lmcE0iJC-oM
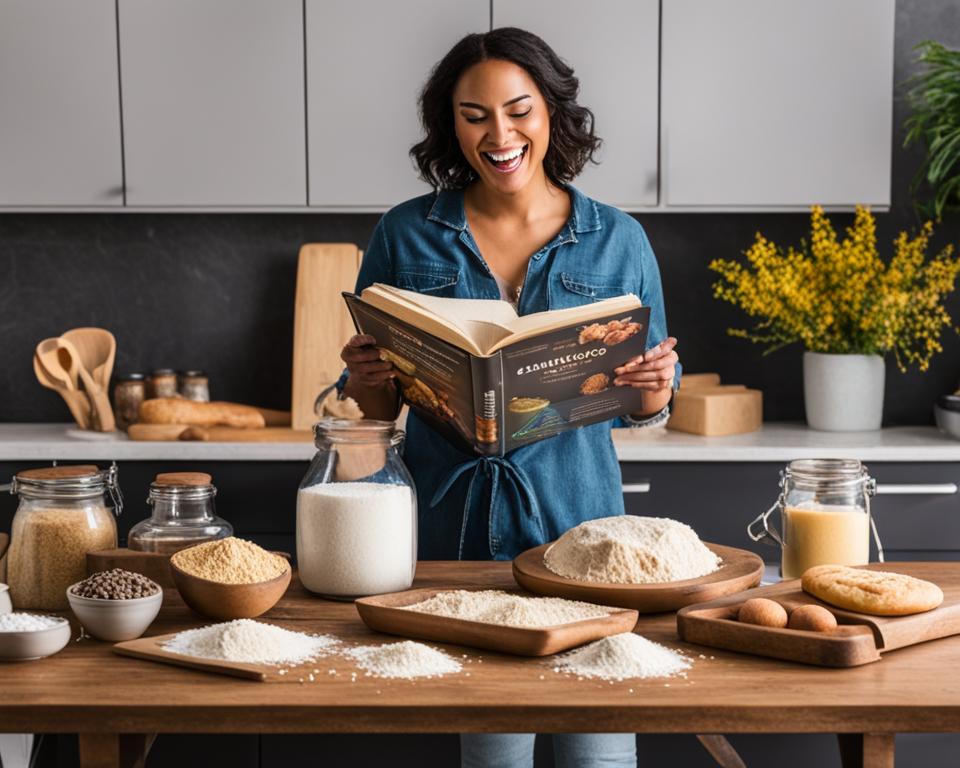
Measure Your Ingredients by Weight
When it comes to gluten-free baking, accurate measurements are crucial for achieving consistent and delicious results. Unlike traditional wheat flour, gluten-free flours tend to be finer and can vary in density. This is where measuring your ingredients by weight can make a significant difference.
Using a kitchen scale ensures precision and eliminates any guesswork. It allows you to accurately measure the exact amount of each ingredient, resulting in a better texture and taste. Measuring by weight also ensures that you are using the correct ratios, as even a slight deviation can affect the overall outcome of your gluten-free baked goods.
If you don’t have a kitchen scale, you can still achieve accurate measurements by using a measuring cup. Here’s how:
- Select the appropriate measuring cup: Use a dry measuring cup for dry ingredients and a liquid measuring cup for liquids.
- Spoon the flour into the cup: Gently spoon the gluten-free flour into the measuring cup, filling it to the top.
- Level the flour: Use a flat edge, like the back of a knife, to level off the excess flour. This ensures that you have the correct amount and prevents any unintentional variations.
Remember, accuracy is key in gluten-free baking. By measuring your ingredients by weight or following the proper measuring technique, you can achieve consistent and delicious gluten-free treats every time.
Expert Tip:
“Investing in a kitchen scale is a game-changer for gluten-free baking. It takes the guesswork out of measurements and ensures more reliable and consistent results.”
– Lisa Johnson, Gluten-Free Baker’s Corner
| Ingredient | Volume Measurement | Weight Measurement (Ounces) |
|---|---|---|
| Gluten-Free Flour | 1 cup | 4.48 oz |
| Granulated Sugar | 1 cup | 7.05 oz |
| Butter | 1/2 cup | 4 oz |
| Milk | 1/4 cup | 2.12 oz |
| Eggs | 2 large | 3.95 oz |
Find the Right Balance of Wet and Dry Ingredients
When it comes to gluten-free baking, finding the perfect balance of wet and dry ingredients is crucial. Gluten-free flours have a tendency to absorb more liquid than traditional wheat flour, which can affect the texture and consistency of your baked goods. By understanding the importance of proper ratios, you can achieve delicious gluten-free treats every time.
One key element in gluten-free baking tips is adjusting the ratio of wet to dry ingredients. It’s essential to follow the recipe closely and make any necessary modifications to ensure the proper texture. Adding either too much or too little liquid can result in dry, crumbly, or dense baked goods. By finding the right balance, you can create moist, tender, and flavorful treats.
To help you understand the significance of proper ratios in gluten-free baking, let’s take a look at a comparison table:
| Gluten-Free Recipe | Wet Ingredients | Dry Ingredients |
|---|---|---|
| Pancakes | 1 cup almond milk | 2 cups gluten-free flour blend |
| Chocolate Chip Cookies | 1/2 cup melted coconut oil | 2 1/4 cups gluten-free all-purpose flour |
| Banana Bread | 3 ripe bananas, mashed | 2 1/2 cups gluten-free oat flour |
In the table above, you can see how different gluten-free recipes require varying ratios of wet and dry ingredients. It’s important to follow these proportions carefully to achieve the desired texture and consistency in your gluten-free baked goods.
Remember, balancing wet and dry ingredients is just one of the many gluten-free baking tips to keep in mind. By understanding the intricacies of gluten-free baking, you can create delicious treats that satisfy even the most discerning palates.

Add More Flavor to Your Batter
When it comes to gluten-free baking, some flours can have a distinct taste that may not be appealing to everyone. However, with a few simple tips, you can enhance the flavor of your gluten-free batters and create delicious treats that everyone will love.
One easy way to add more flavor to your gluten-free batter is by incorporating extra vanilla extract. Vanilla extract not only adds a hint of sweetness but also helps to mask any undesirable flavors in the flour. Add a teaspoon or two of vanilla extract to your batter, depending on your personal preference, and enjoy the enhanced taste in your baked goods.
Another option is to experiment with different spices and flavorings. Cinnamon, nutmeg, cardamom, or even a pinch of salt can elevate the taste of your gluten-free batters. Explore different combinations to find the flavors that best complement your baked goods.
Additionally, you can enhance the flavor by using flavored extracts, such as almond or lemon extract. These extracts add a unique taste to your batters and create a more enjoyable eating experience.
“Adding extra vanilla or other spices/flavorings can help mask this taste and enhance the overall flavor of your baked goods.”
Furthermore, incorporating fruits or nuts into your batter can provide an extra burst of flavor. Fresh berries, chopped apples, or toasted nuts can add both texture and taste to your gluten-free treats.
| Flavoring Options | Benefits |
|---|---|
| Vanilla extract | Mask undesirable flavors and add sweetness |
| Spices (cinnamon, nutmeg, etc.) | Elevate the taste profile of your baked goods |
| Flavored extracts (almond, lemon, etc.) | Add unique and delightful flavors |
| Fruits and nuts | Enhance taste and provide texture |
By incorporating these tips into your gluten-free baking routine, you can take your baked goods to another level, ensuring that they are not only gluten-free but also bursting with flavor.
Don’t be Afraid to Overmix Your Batter
In gluten-free baking, overmixing the batter is actually beneficial, contrary to traditional baking. While overmixing wheat-based batter can result in a tough texture, gluten-free batter benefits from the extra mixing. Mixing the gluten-free batter longer helps create a better rise and structure in your baked goods.
Gluten-free flours, such as almond flour or rice flour, lack the elastic properties of gluten that provide structure and support in traditional baking. By mixing the batter for an extended period, you allow the other ingredients, such as eggs and baking powder, to create a more robust network, resulting in improved texture and volume.
Benefits of Overmixing Gluten-Free Batter:
- Better Rise: Overmixing activates the leavening agents more effectively, allowing the batter to rise evenly and achieve a desirable height.
- Improved Structure: The prolonged mixing time helps distribute air bubbles throughout the batter, contributing to a lighter and more airy crumb.
- Enhanced Moisture Distribution: Extra mixing ensures that all the ingredients are well incorporated, preventing pockets of dry or wet spots in the baked goods.
- Even Browning: Overmixing helps distribute ingredients evenly, resulting in more consistent browning and a visually appealing final product.
While overmixing is advantageous in gluten-free baking, it’s important to note that you should still be mindful of the overall mixing time. Excessively long mixing can lead to potential texture issues, so it’s essential to find the right balance. Experiment with different techniques and observe how the batter responds to achieve the best results.

Remember, don’t shy away from overmixing when it comes to gluten-free baking. Embrace this technique to create beautifully risen, moist, and delicious gluten-free treats.
Let the Batter Rest
Allowing gluten-free batter to rest is a crucial step in gluten-free baking. Resting the batter for about 30 minutes before baking provides several benefits that result in a better texture and taste in your gluten-free treats. By giving the batter time to rest, you allow the flours to hydrate and soften, reducing any potential grittiness in your baked goods.
This resting period is especially important for recipes with shorter baking times, such as cookies and pancakes. While traditional baking may not require much resting time, gluten-free baking benefits greatly from this additional step. It allows the ingredients to fully integrate, leading to a more cohesive batter and better overall results.
“Resting the gluten-free batter allows the flours to fully hydrate, resulting in a smoother texture and enhanced flavor in the final baked goods.”
To implement this tip, simply cover your gluten-free batter with a clean kitchen towel and let it sit at room temperature for about 30 minutes. During this time, the ingredients will meld together, creating a batter that is easier to work with and yields superior results.
Remember to plan your baking process accordingly to account for the resting time. While it may add a bit of extra waiting time, the improved texture and taste of your gluten-free treats will be well worth it.
Benefits of Resting the Batter:
- Hydrates and softens the gluten-free flours
- Reduces grittiness in the final baked goods
- Allows the ingredients to fully integrate for a cohesive batter
- Improves texture and taste of gluten-free treats
Next time you embark on a gluten-free baking adventure, don’t forget to let your batter rest. The result will be delightful treats that are sure to impress!
Bake Your Dessert Longer
When it comes to gluten-free baking, longer baking times are often necessary to ensure proper doneness and achieve the desired texture in your baked goods. Gluten-free recipes require additional time in the oven to drive off excess moisture and allow the ingredients to fully set.
Excess moisture can be a common issue with gluten-free flours, which have different properties compared to traditional wheat flour. The longer baking time helps evaporate this moisture, resulting in a more enjoyable texture in your gluten-free treats.
It’s crucial to follow the baking time specified in the recipe for best results. While it may be tempting to remove your baked goods from the oven early, additional time in the oven allows the flavors to develop and ensures a fully cooked center.
Properly baked gluten-free goods should have a golden brown color on the edges and a slightly firm texture in the center. Insert a toothpick or cake tester into the center of your dessert during the last few minutes of baking to check for doneness. If it comes out clean or with only a few crumbs clinging to it, your baked goods are ready to be taken out of the oven.
Remember, each recipe may have different baking times, so always refer to the instructions provided. Adjustments to the baking time might be needed depending on your oven’s temperature accuracy and the size of your baking dish.
Key Points:
- Baking gluten-free desserts for longer ensures excess moisture is driven off and desirable texture is achieved.
- Follow the provided baking time in the recipe and check for doneness by using a toothpick or cake tester.
- Gluten-free baked goods should have a golden brown color on the edges and a slightly firm texture in the center.
| Gluten-Free Dessert | Recipe Baking Time | Add an Extra X minutes |
|---|---|---|
| Chocolate Chip Cookies | 12-15 minutes | 2-3 minutes |
| Vanilla Cupcakes | 18-20 minutes | 3-5 minutes |
| Blueberry Muffins | 20-25 minutes | 5-7 minutes |
| Banana Bread | 50-60 minutes | 10-15 minutes |
Freeze Your Leftovers
Preserving the freshness of gluten-free baked goods can be a challenge. Fortunately, there is a simple solution to extend their shelf life and ensure you always have delicious treats on hand – freezing! By freezing your gluten-free creations, you can enjoy them whenever you want, without worrying about them going stale.
Whether it’s a batch of fluffy waffles, gooey brownies, tempting cupcakes, or a loaf of scrumptious bread, freezing gluten-free baked goods is a great way to preserve their taste and texture. To freeze your treats, allow them to cool completely before packaging them in airtight containers or freezer bags. Make sure to label and date each item to keep track of them in the freezer.
When you’re ready to enjoy your frozen gluten-free treats, simply take them out of the freezer and let them thaw at room temperature. To revive the freshness, you can warm them up in the oven or microwave. This way, you can savor the delectable flavors of your homemade gluten-free goodies at any time.
So, don’t let your gluten-free baked goods go to waste. Take advantage of the freezing method to keep them fresh for longer and indulge in mouthwatering treats whenever the craving strikes. With this handy tip, you can make the most of your gluten-free baking efforts and ensure that every bite is a delight!
FAQ
What are some essential gluten-free baking tips?
Some essential gluten-free baking tips include starting with simple recipes, closely following gluten-free recipes, measuring ingredients by weight, adjusting the balance of wet and dry ingredients, adding extra flavorings to mask any undesirable tastes, mixing batter more thoroughly, allowing the batter to rest before baking, extending the baking time for proper texture, and freezing leftovers to preserve freshness.
Why is it recommended to start with simple recipes when transitioning to gluten-free baking?
Starting with simple recipes like brownies, cookies, or pancakes helps build confidence in gluten-free baking and allows for a smoother transition. As you become more comfortable, you can then experiment with more complex recipes.
Why is it important to closely follow gluten-free recipes?
Closely following gluten-free recipes is important because these recipes have been specifically tested with gluten-free flours and ingredients to ensure the best results. Unlike traditional baking where substitutions are common, gluten-free baking requires precise measurements and ingredient selections.
Why should gluten-free flours be measured by weight instead of volume?
Gluten-free flours are finer than traditional wheat flour, so measuring by weight ensures consistency and accurate results. If you don’t have a kitchen scale, you can use a measuring cup and level it off with a flat edge.
Why is it necessary to adjust the balance of wet and dry ingredients in gluten-free recipes?
Gluten-free flours absorb more liquid than traditional flour, so it’s important to adjust the ratio of wet and dry ingredients in gluten-free recipes. This ensures a proper texture and consistency in your baked goods.
How can I enhance the flavor of gluten-free baked goods?
Some gluten-free flours can have a distinct taste, which may be undesirable to some. Adding extra vanilla or other spices/flavorings can help mask this taste and enhance the overall flavor of your baked goods.
Why is overmixing beneficial in gluten-free baking?
Unlike traditional baking where overmixing can lead to a tough texture, gluten-free batter benefits from extra mixing. This helps create a better rise and structure in your baked goods.
Why is it important to let gluten-free batter rest before baking?
Allowing gluten-free batter to rest for about 30 minutes before baking helps hydrate and soften the flours, resulting in a better texture and reduced grittiness. This is especially important for shorter baking time recipes like cookies and pancakes.
Why do gluten-free baked goods require longer baking times?
Gluten-free baked goods often require longer baking times compared to traditional recipes. This ensures that excess moisture is driven off and the baked goods have a desirable texture. It’s important to follow the baking time according to the recipe for best results.
How can I extend the shelf life of gluten-free baked goods?
Gluten-free baked goods tend to lose freshness quickly, so freezing leftovers can help extend their shelf life. You can freeze items like waffles, brownies, cupcakes, and bread, allowing you to enjoy homemade gluten-free treats whenever you want.